Working with Projects
Each Kargo project is represented by a cluster-scoped Kubernetes resource of
type Project. Reconciliation of such a resource effects all boilerplate
project initialization, including the creation of a specially-labeled
Namespace with the same name as the Project. All resources belonging to a
given Project should be grouped together in that Namespace.
A minimal Project resource looks like the following:
apiVersion: kargo.akuity.io/v1alpha1
kind: Project
metadata:
  name: example
Deletion of a Project resource results in the deletion of the corresponding
Namespace. For convenience, the inverse is also true -- deletion of a
project's Namespace results in the deletion of the corresponding Project
resource.
There are compelling advantages to using Project resources instead of
permitting users to create Namespace resources directly:
-
The required label indicating a
Namespaceis a Kargo project cannot be forgotten or misapplied. -
Users can be granted permission to indirectly create
Namespaceresources for Kargo projects only without being granted more general permissions to create any newNamespacedirectly. -
Boilerplate configuration is automatically created at the time of
Projectcreation. This includes things such as project-level RBAC resources andServiceAccountresources.
Project Configuration
A ProjectConfig resource defines project-level configuration for an associated
Project. At present, this only includes
promotion policies
that describe which Stages are eligible for automatic promotion of newly
available Freight.
The ProjectConfig resource must have the same name as its associated Project
and be created in the Namespace of the Project. This separation of
configuration from the Project resource enables more granular RBAC control.
Users can be granted permission to modify project configurations via
ProjectConfig resources without necessarily having broader access to Project
resources themselves.
Promotion Policies
A ProjectConfig resource can contain multiple promotion policies. Each policy
is defined by a stageSelector and an autoPromotionEnabled flag. The
stageSelector specifies which Stages the policy applies to, and the
autoPromotionEnabled flag indicates whether automatic promotion is enabled for
those Stages.
Basic Promotion Policy
In the example below, the test and uat Stages are eligible for automatic
promotion of newly available Freight, but any other Stages in the Project
are not:
---
apiVersion: kargo.akuity.io/v1alpha1
kind: Project
metadata:
   name: example
---
apiVersion: kargo.akuity.io/v1alpha1
kind: ProjectConfig
metadata:
  name: example
  namespace: example
spec:
  promotionPolicies:
  - stageSelector:
      name: test
    autoPromotionEnabled: true
  - stageSelector:
      name: uat
    autoPromotionEnabled: true
Advanced Promotion Policies with Selectors
Kargo supports more flexible ways to specify which Stages a promotion policy
applies to, using either pattern matching or label selectors.
Pattern and label matching introduce security considerations. Users with appropriate permissions could potentially create resources with names or labels deliberately crafted to match patterns, bypassing intended promotion controls. Using exact names provides the most secure option.
Using Stage Selectors with Patterns
You can use the stageSelector field with pattern matching to apply a promotion
policy to multiple Stages that match a specific pattern:
---
apiVersion: kargo.akuity.io/v1alpha1
kind: Project
metadata:
  name: example
---
apiVersion: kargo.akuity.io/v1alpha1
kind: ProjectConfig
metadata:
  name: example
  namespace: example
spec:
  promotionPolicies:
  - stageSelector:
      # Apply to a specific stage by exact name
      name: prod-east
    autoPromotionEnabled: false
  - stageSelector:
      # Apply to all stages matching a regex pattern
      name: "regex:test-.*"
    autoPromotionEnabled: true
  - stageSelector:
      # Apply to all stages matching a glob pattern
      name: "glob:dev-*"
    autoPromotionEnabled: true
The pattern matching supports:
- Exact name matching (when no prefix is used)
- Regex patterns with prefix
regex:orregexp: - Glob patterns with prefix
glob:
Using Stage Selectors with Labels
You can also use
Kubernetes-style label selectors
to apply a promotion policy to Stages with specific labels:
---
apiVersion: kargo.akuity.io/v1alpha1
kind: Project
metadata:
  name: example
---
apiVersion: kargo.akuity.io/v1alpha1
kind: ProjectConfig
metadata:
  name: example
  namespace: example
spec:
  promotionPolicies:
  - stageSelector:
      matchLabels:
        environment: development
    autoPromotionEnabled: true
  - stageSelector:
      matchExpressions:
      - key: environment
        operator: In
        values: ["development", "staging"]
    autoPromotionEnabled: true
Using Stage Selectors with Patterns and Labels
The name and
label selectors can be combined, in which
case a Stage must match both the name and label selectors to be eligible for
automatic promotion:
---
apiVersion: kargo.akuity.io/v1alpha1
kind: Project
metadata:
  name: example
---
apiVersion: kargo.akuity.io/v1alpha1
kind: ProjectConfig
metadata:
  name: example
  namespace: example
spec:
  promotionPolicies:
  - stageSelector:
      name: glob:prod-*
      matchLabels:
        example.org/allow-auto-promotion: "true"
In the example above, the promotion policy applies to all Stages with the
example.org/allow-auto-promotion: "true" label and names matching the
glob:prod-* pattern.
Namespace Adoption
At times, Namespaces may require specific configuration to
comply with regulatory or organizational requirements. To
account for this, Kargo supports the adoption of pre-existing
Namespaces that are labeled with kargo.akuity.io/project: "true".
This enables pre-configuring such Namespaces according to your
own requirements.
Requiring a Namespace to have the kargo.akuity.io/project: "true" label to
be eligible for adoption by a new Project is intended to prevent accidental or
willful hijacking of an existing Namespace.
The following example demonstrates adoption of a Namespace that's been
pre-configured with a label unrelated to Kargo:
apiVersion: v1
kind: Namespace
metadata:
  name: example
labels:
  kargo.akuity.io/project: "true"
  example.com/org: platform-eng
---
apiVersion: kargo.akuity.io/v1alpha1
kind: Project
metadata:
  name: example
spec:
  # ...
Preventing Namespace Deletion
By default, when a Project is deleted, Kargo will attempt to delete the corresponding Namespace. However, there are scenarios where you may want to retain the namespace after the associated Project is removed whether it was created by Kargo or adopted from an existing setup.
To achieve this, you can apply the following annotation to the Namespace or
the corresponding Project resource with
kargo.akuity.io/keep-namespace: "true".
Interacting with Projects
Kargo provides tools to manage Projects using either its UI or
CLI. This section explains how to handle Projects effectively through both interfaces.
Creating a Project
- Using the UI
- Using the CLI
-
Navigate to the Kargo UI and select Create in the top right corner.
A Form tab will appear where you can enter the name of your
Project: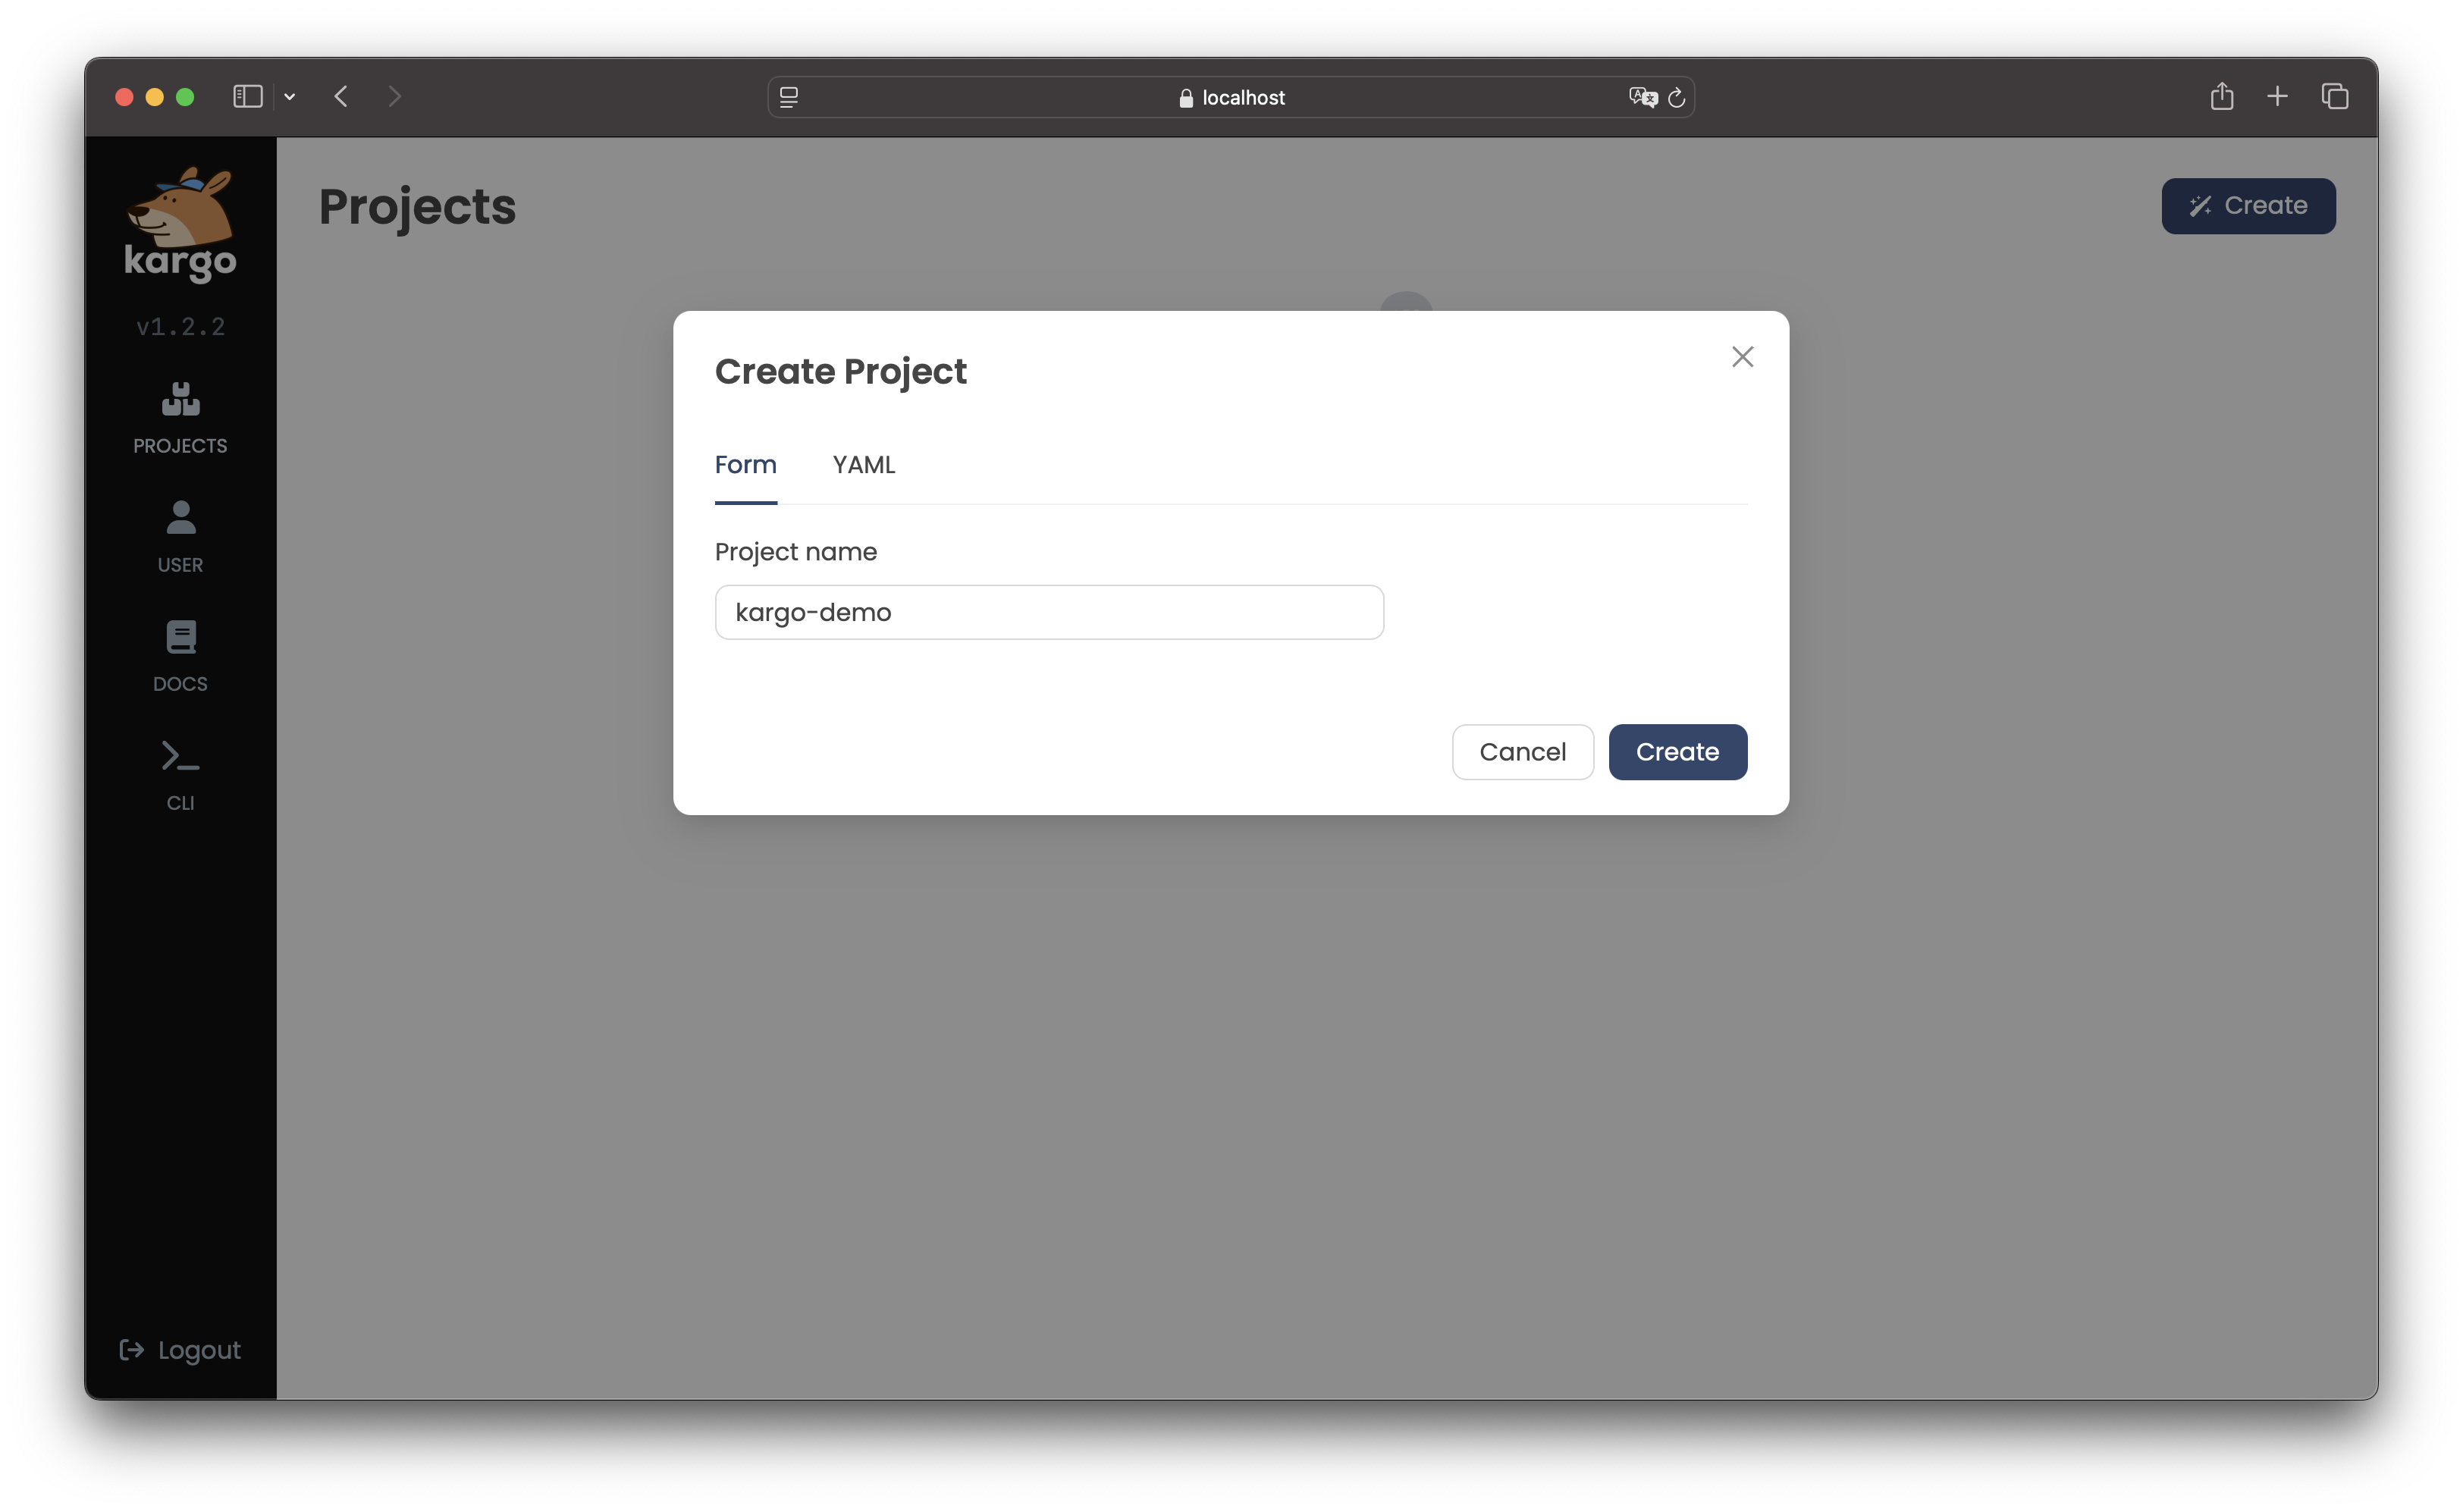
Alternatively, you can define the
Projectand other related configurations using the YAML tab: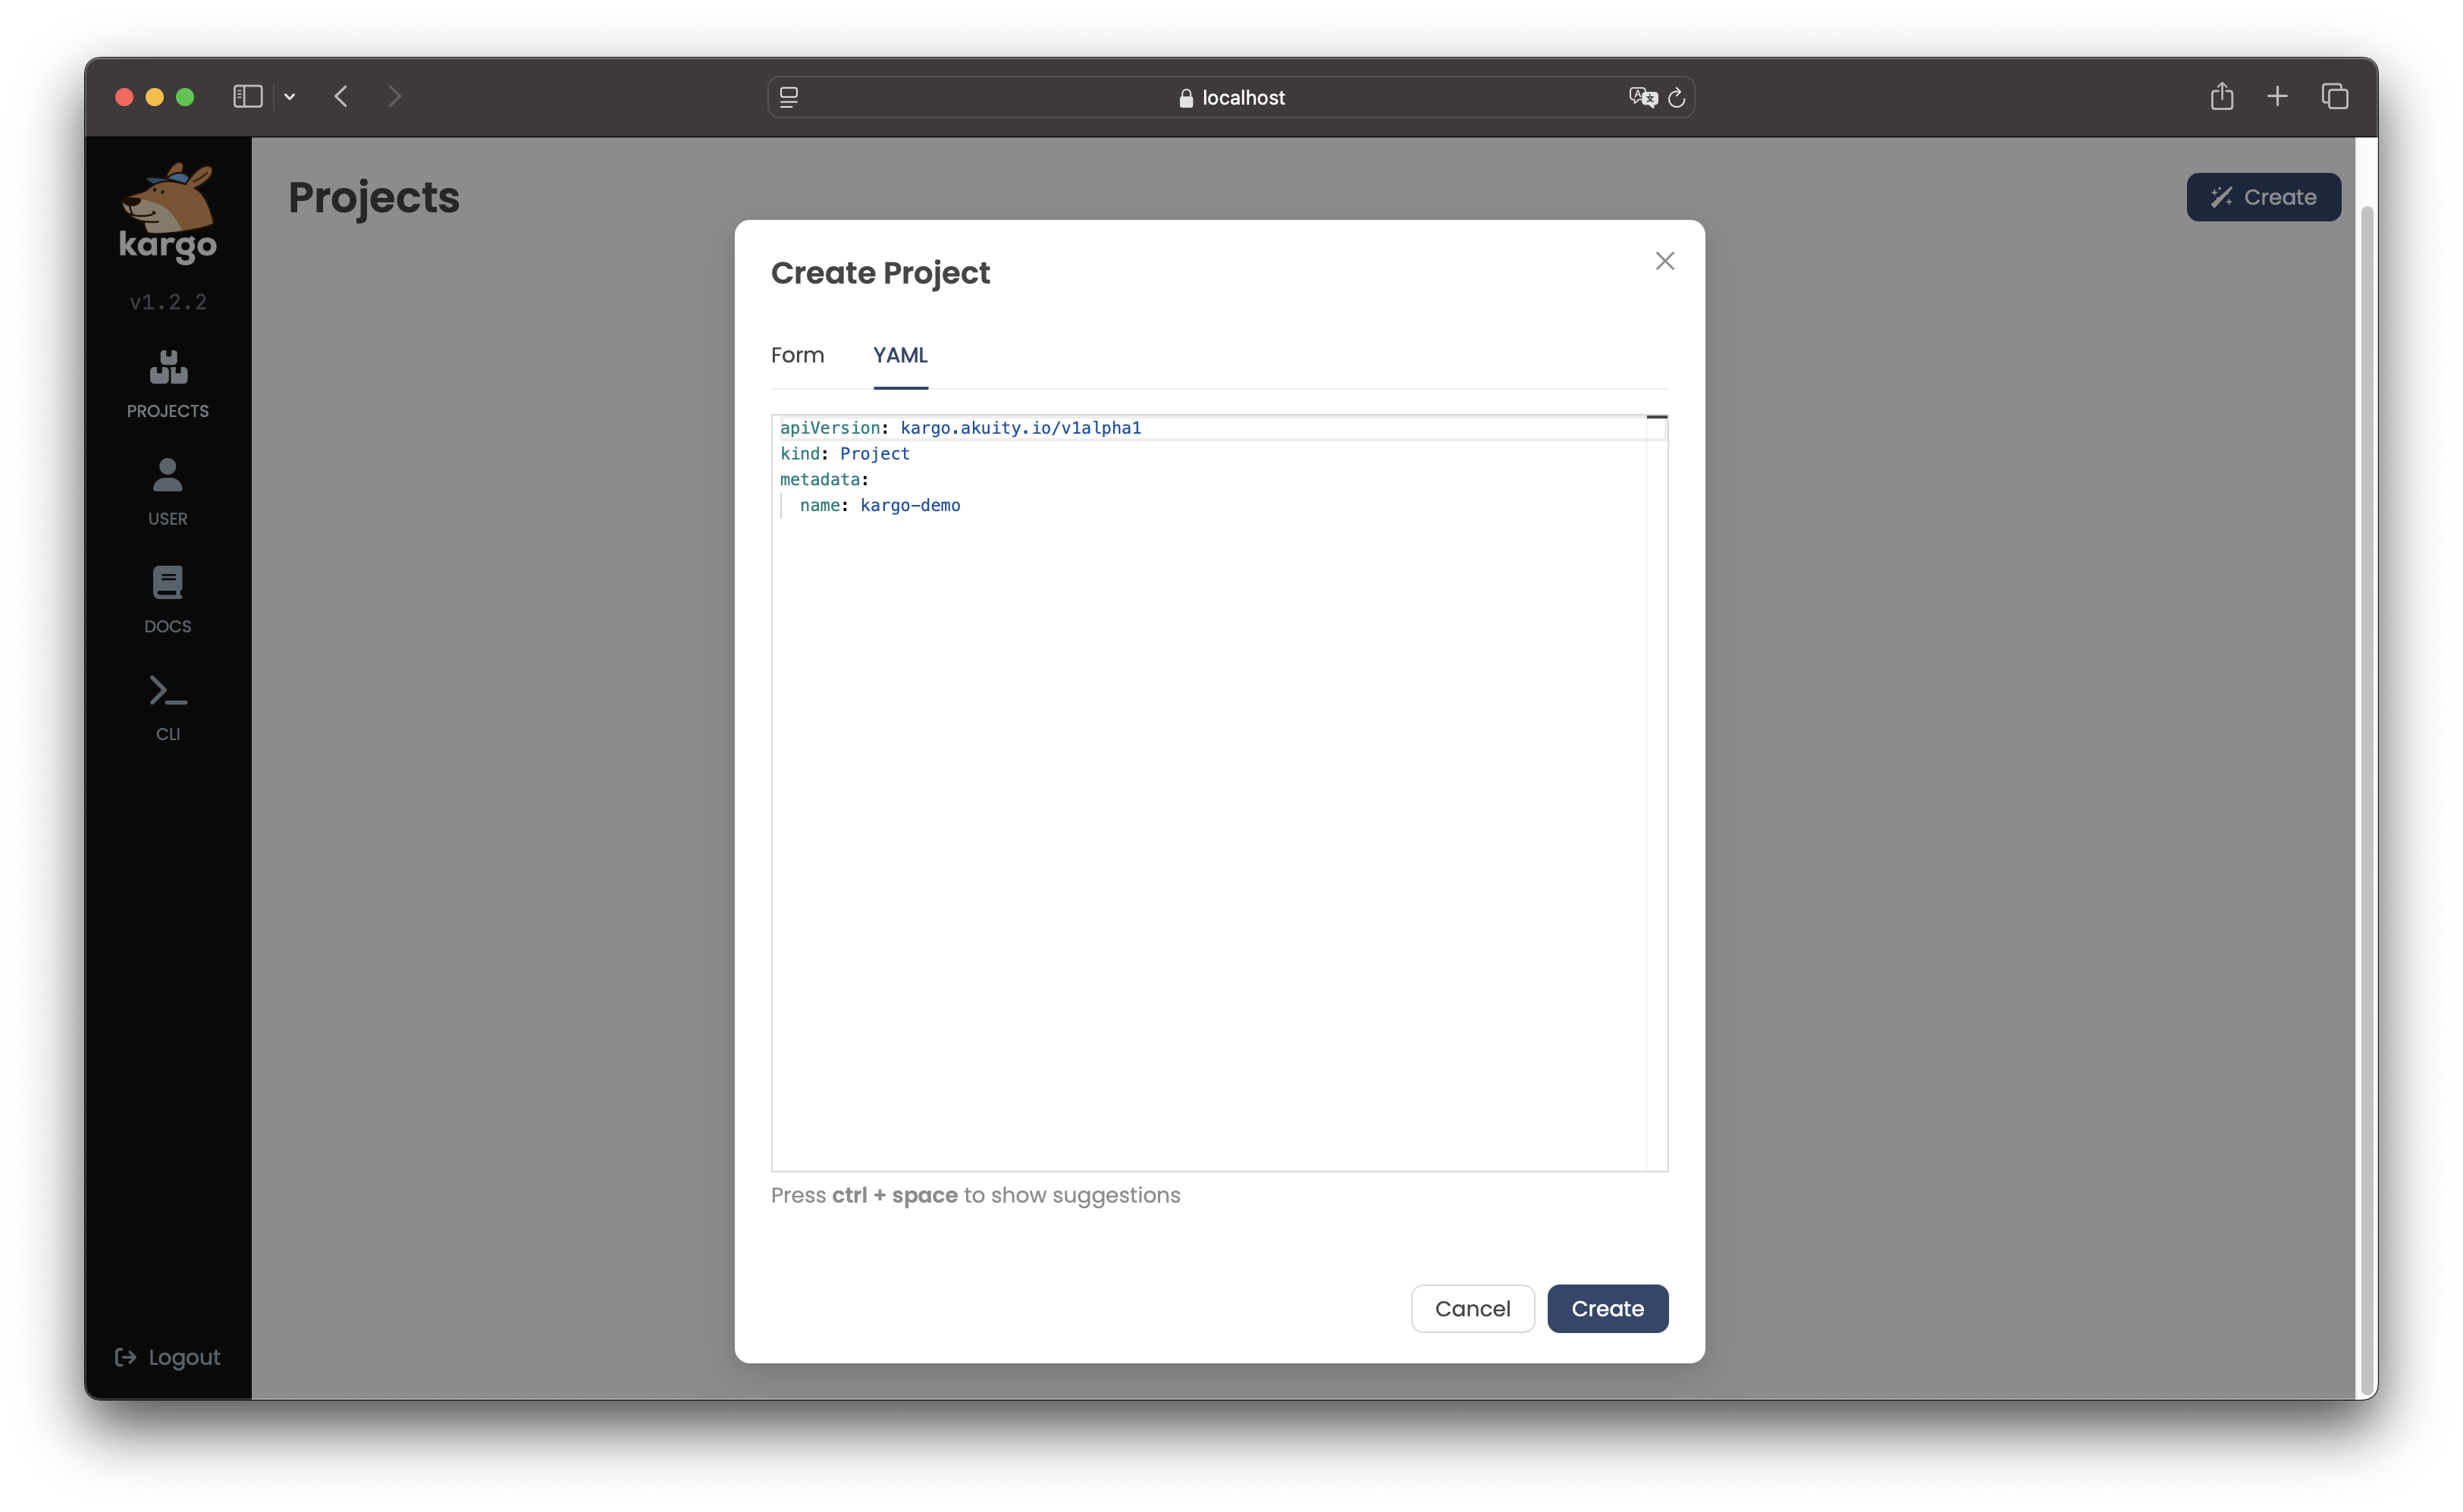
-
After completing the Form or defining the
Projectin the YAML tab, click Create.The new
Projectwill appear a card on the UI's home page: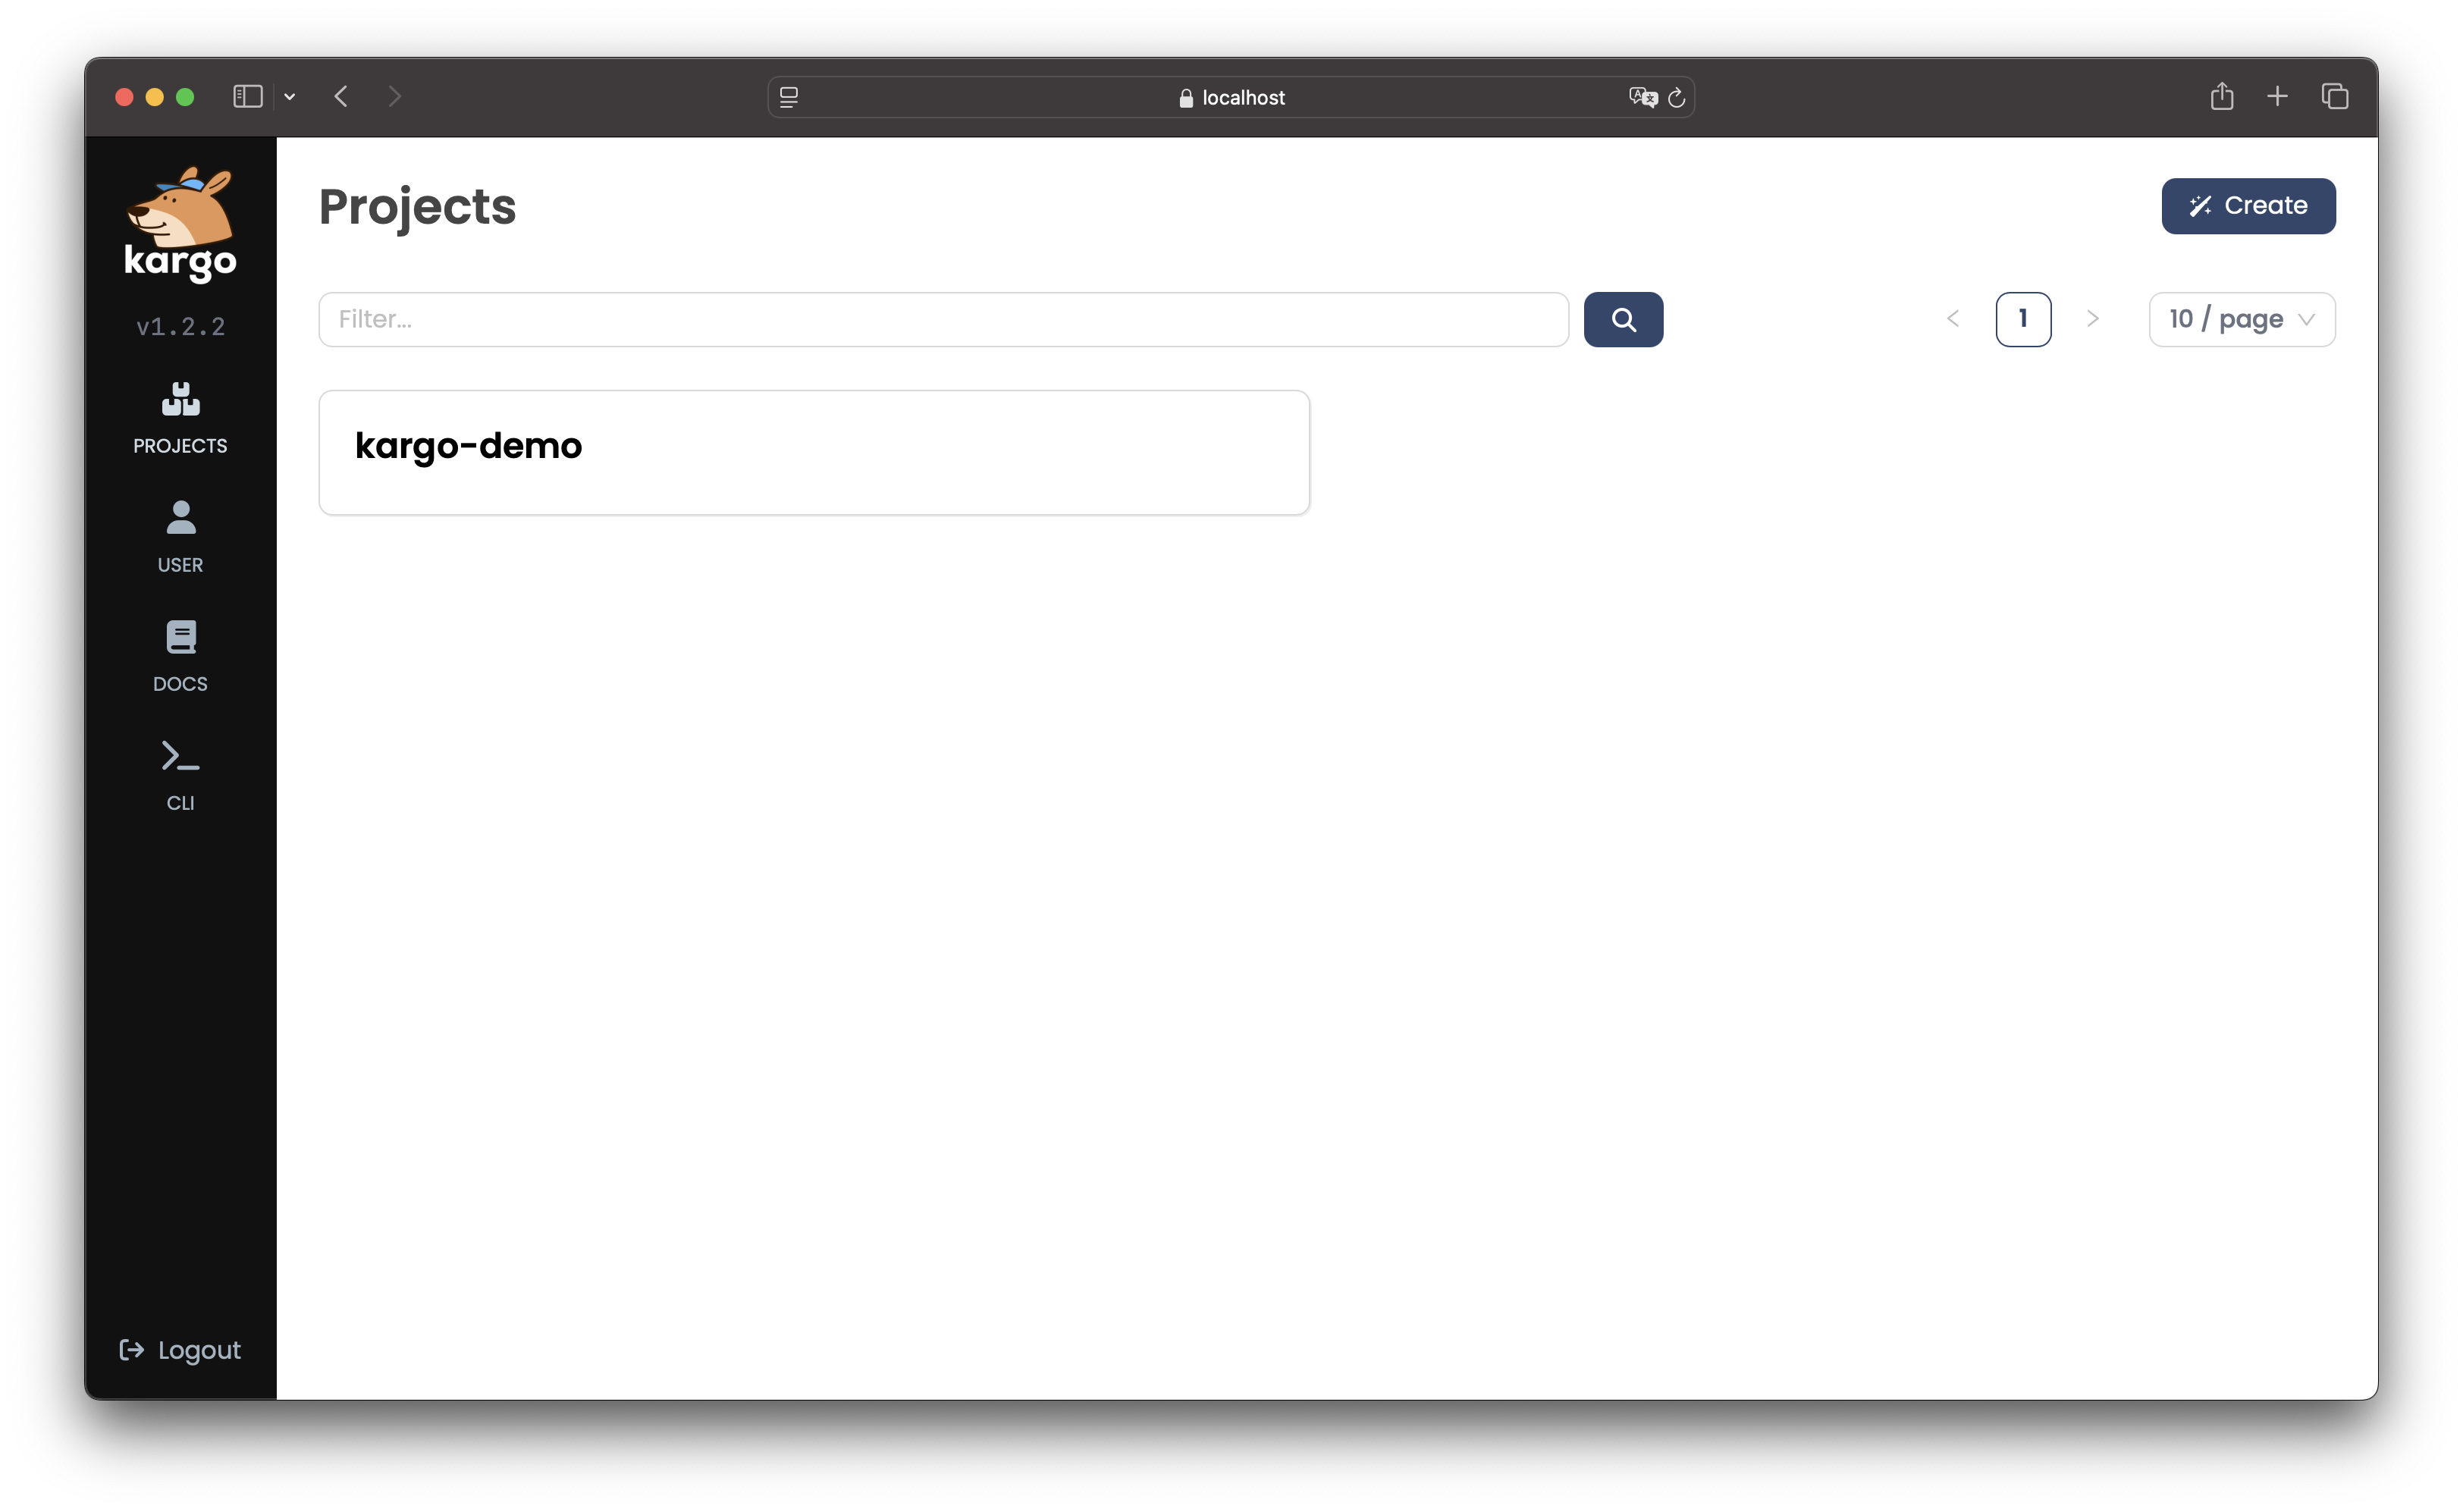
-
To create a
Projectusing the CLI, run:kargo create project <project>Alternatively, define the
Projectin a YAML file, for example:apiVersion: kargo.akuity.io/v1alpha1
kind: Project
metadata:
name: <project>Save the file and run:
kargo create -f <filename> -
To verify creation of the
Project, run:kargo get project <project>
Deleting a Project
- Using the UI
- Using the CLI
-
Select the
Projectyou want to remove. -
Click the dropdown next to the
Project's name in the upper left corner of theProjectdashboard and click Delete: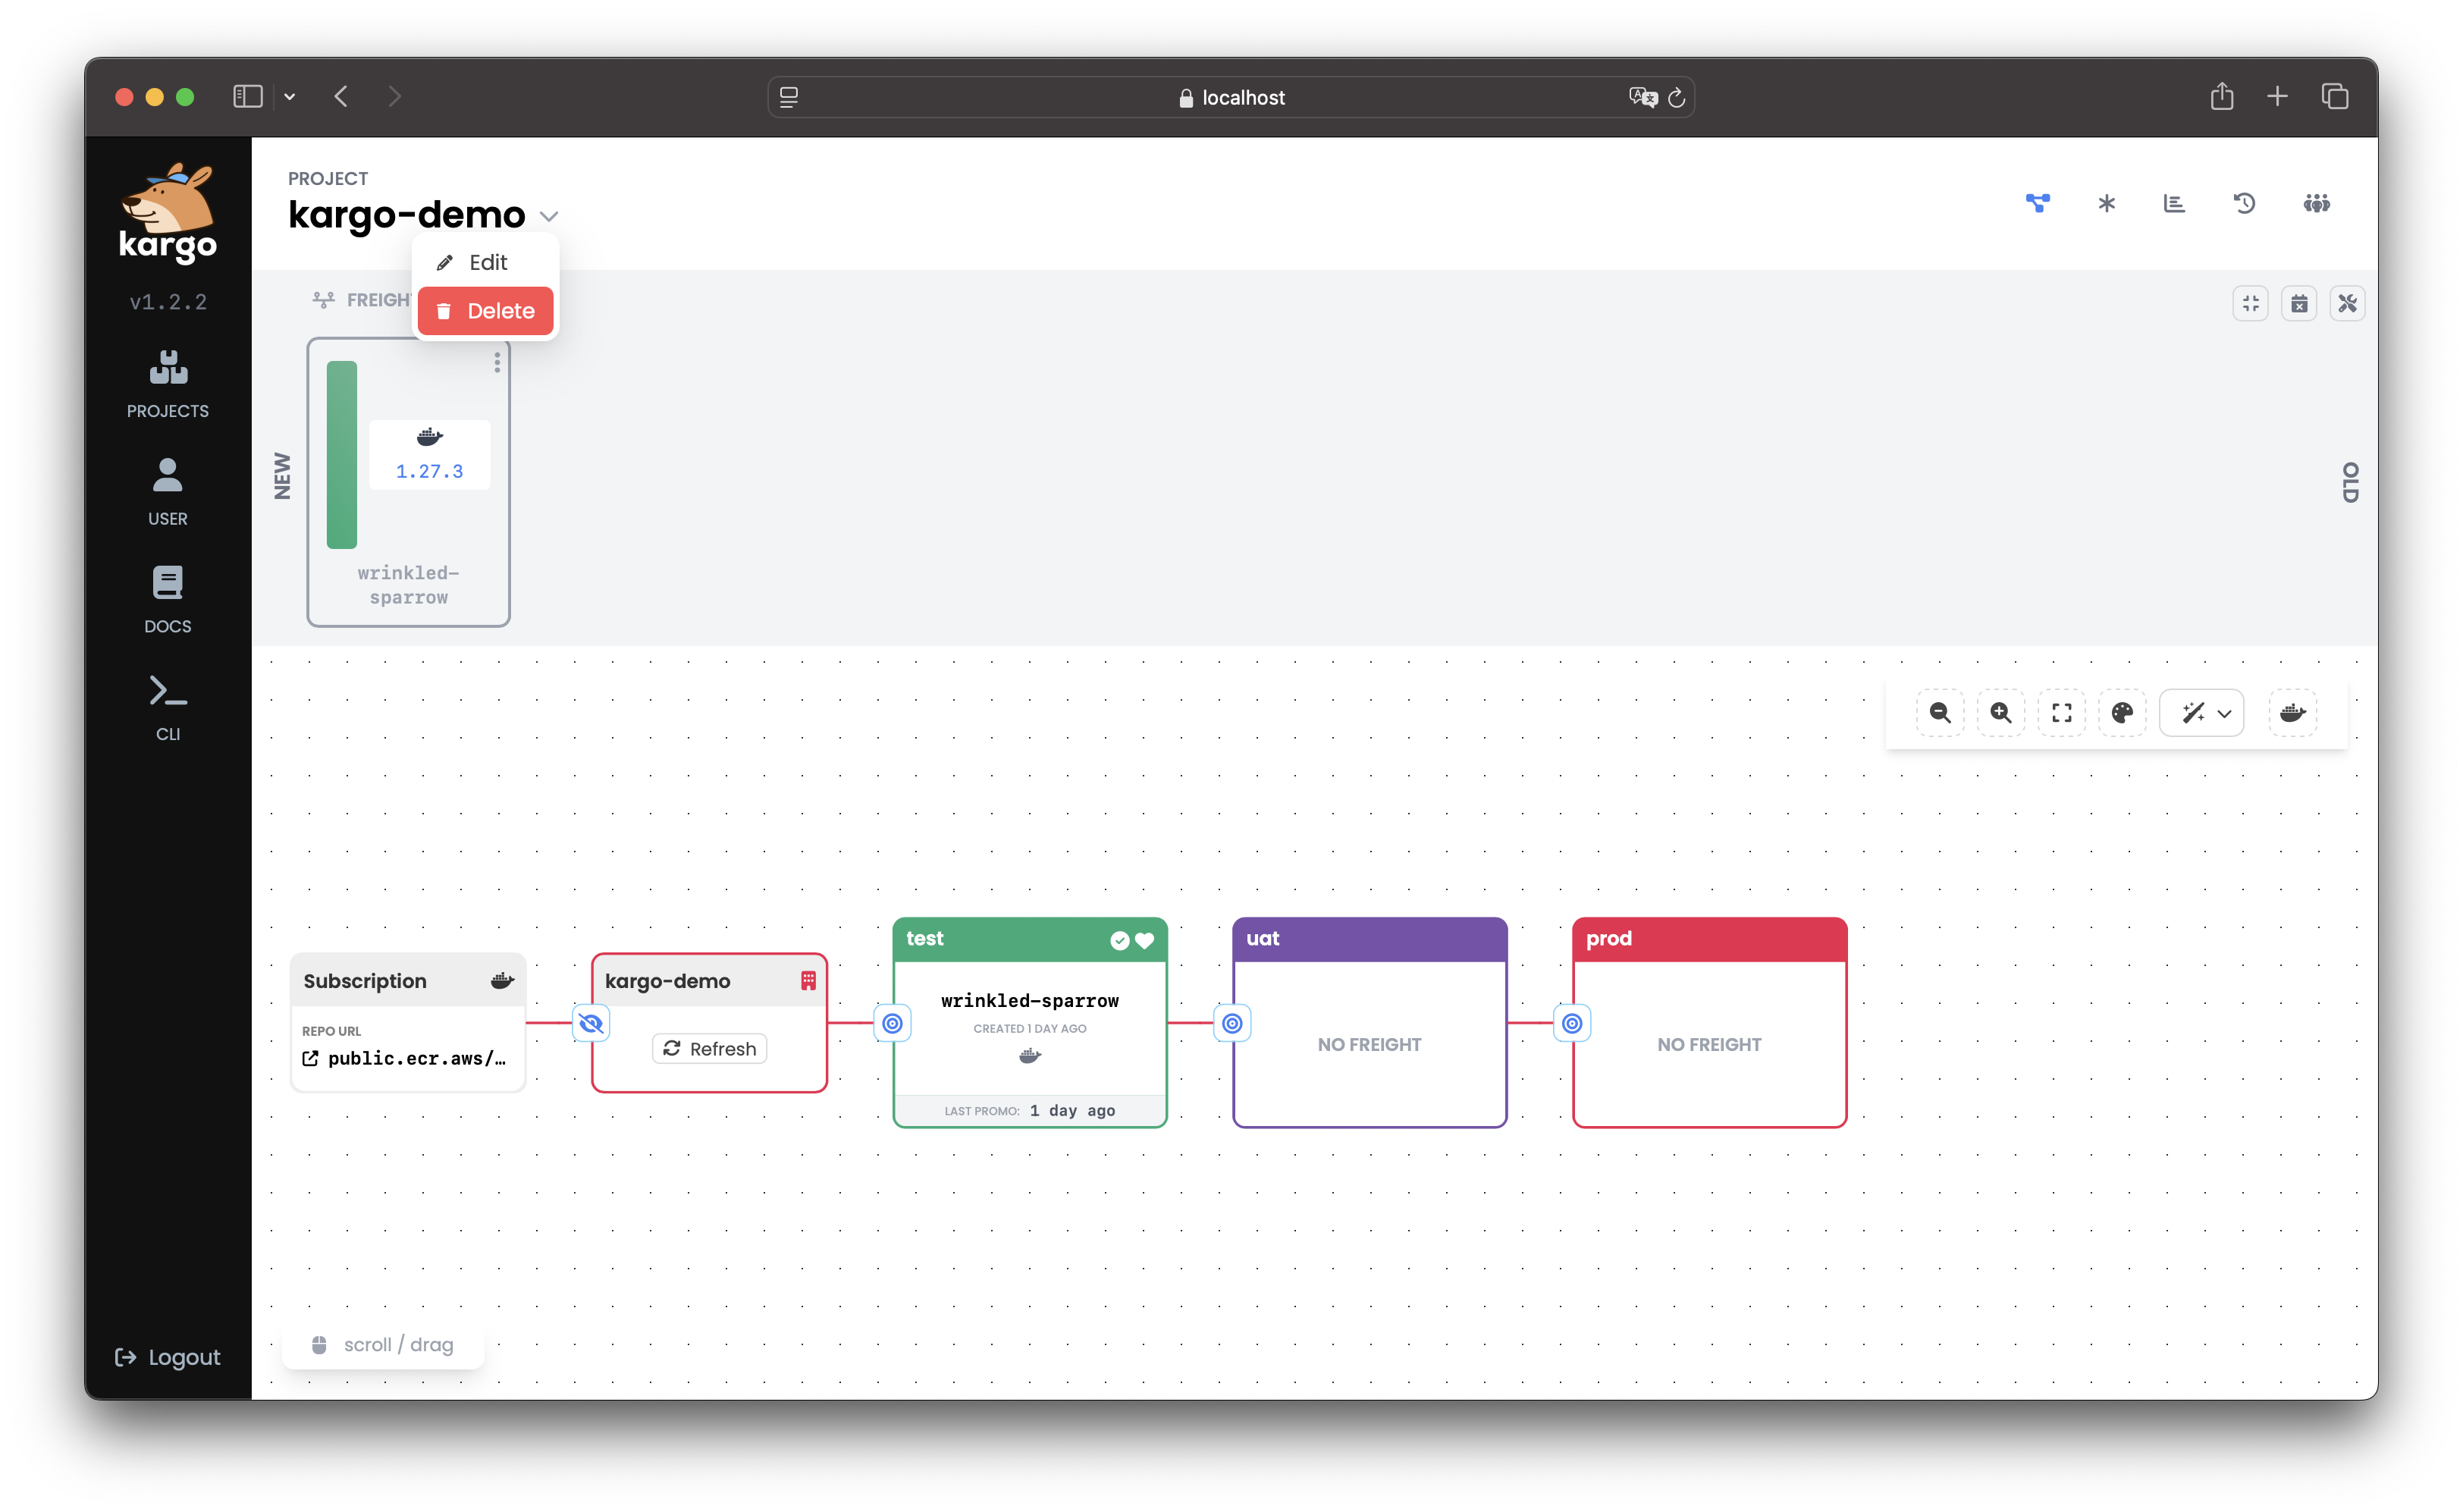
-
To confirm deletion, enter the
Project's name and click Delete to permanently remove it: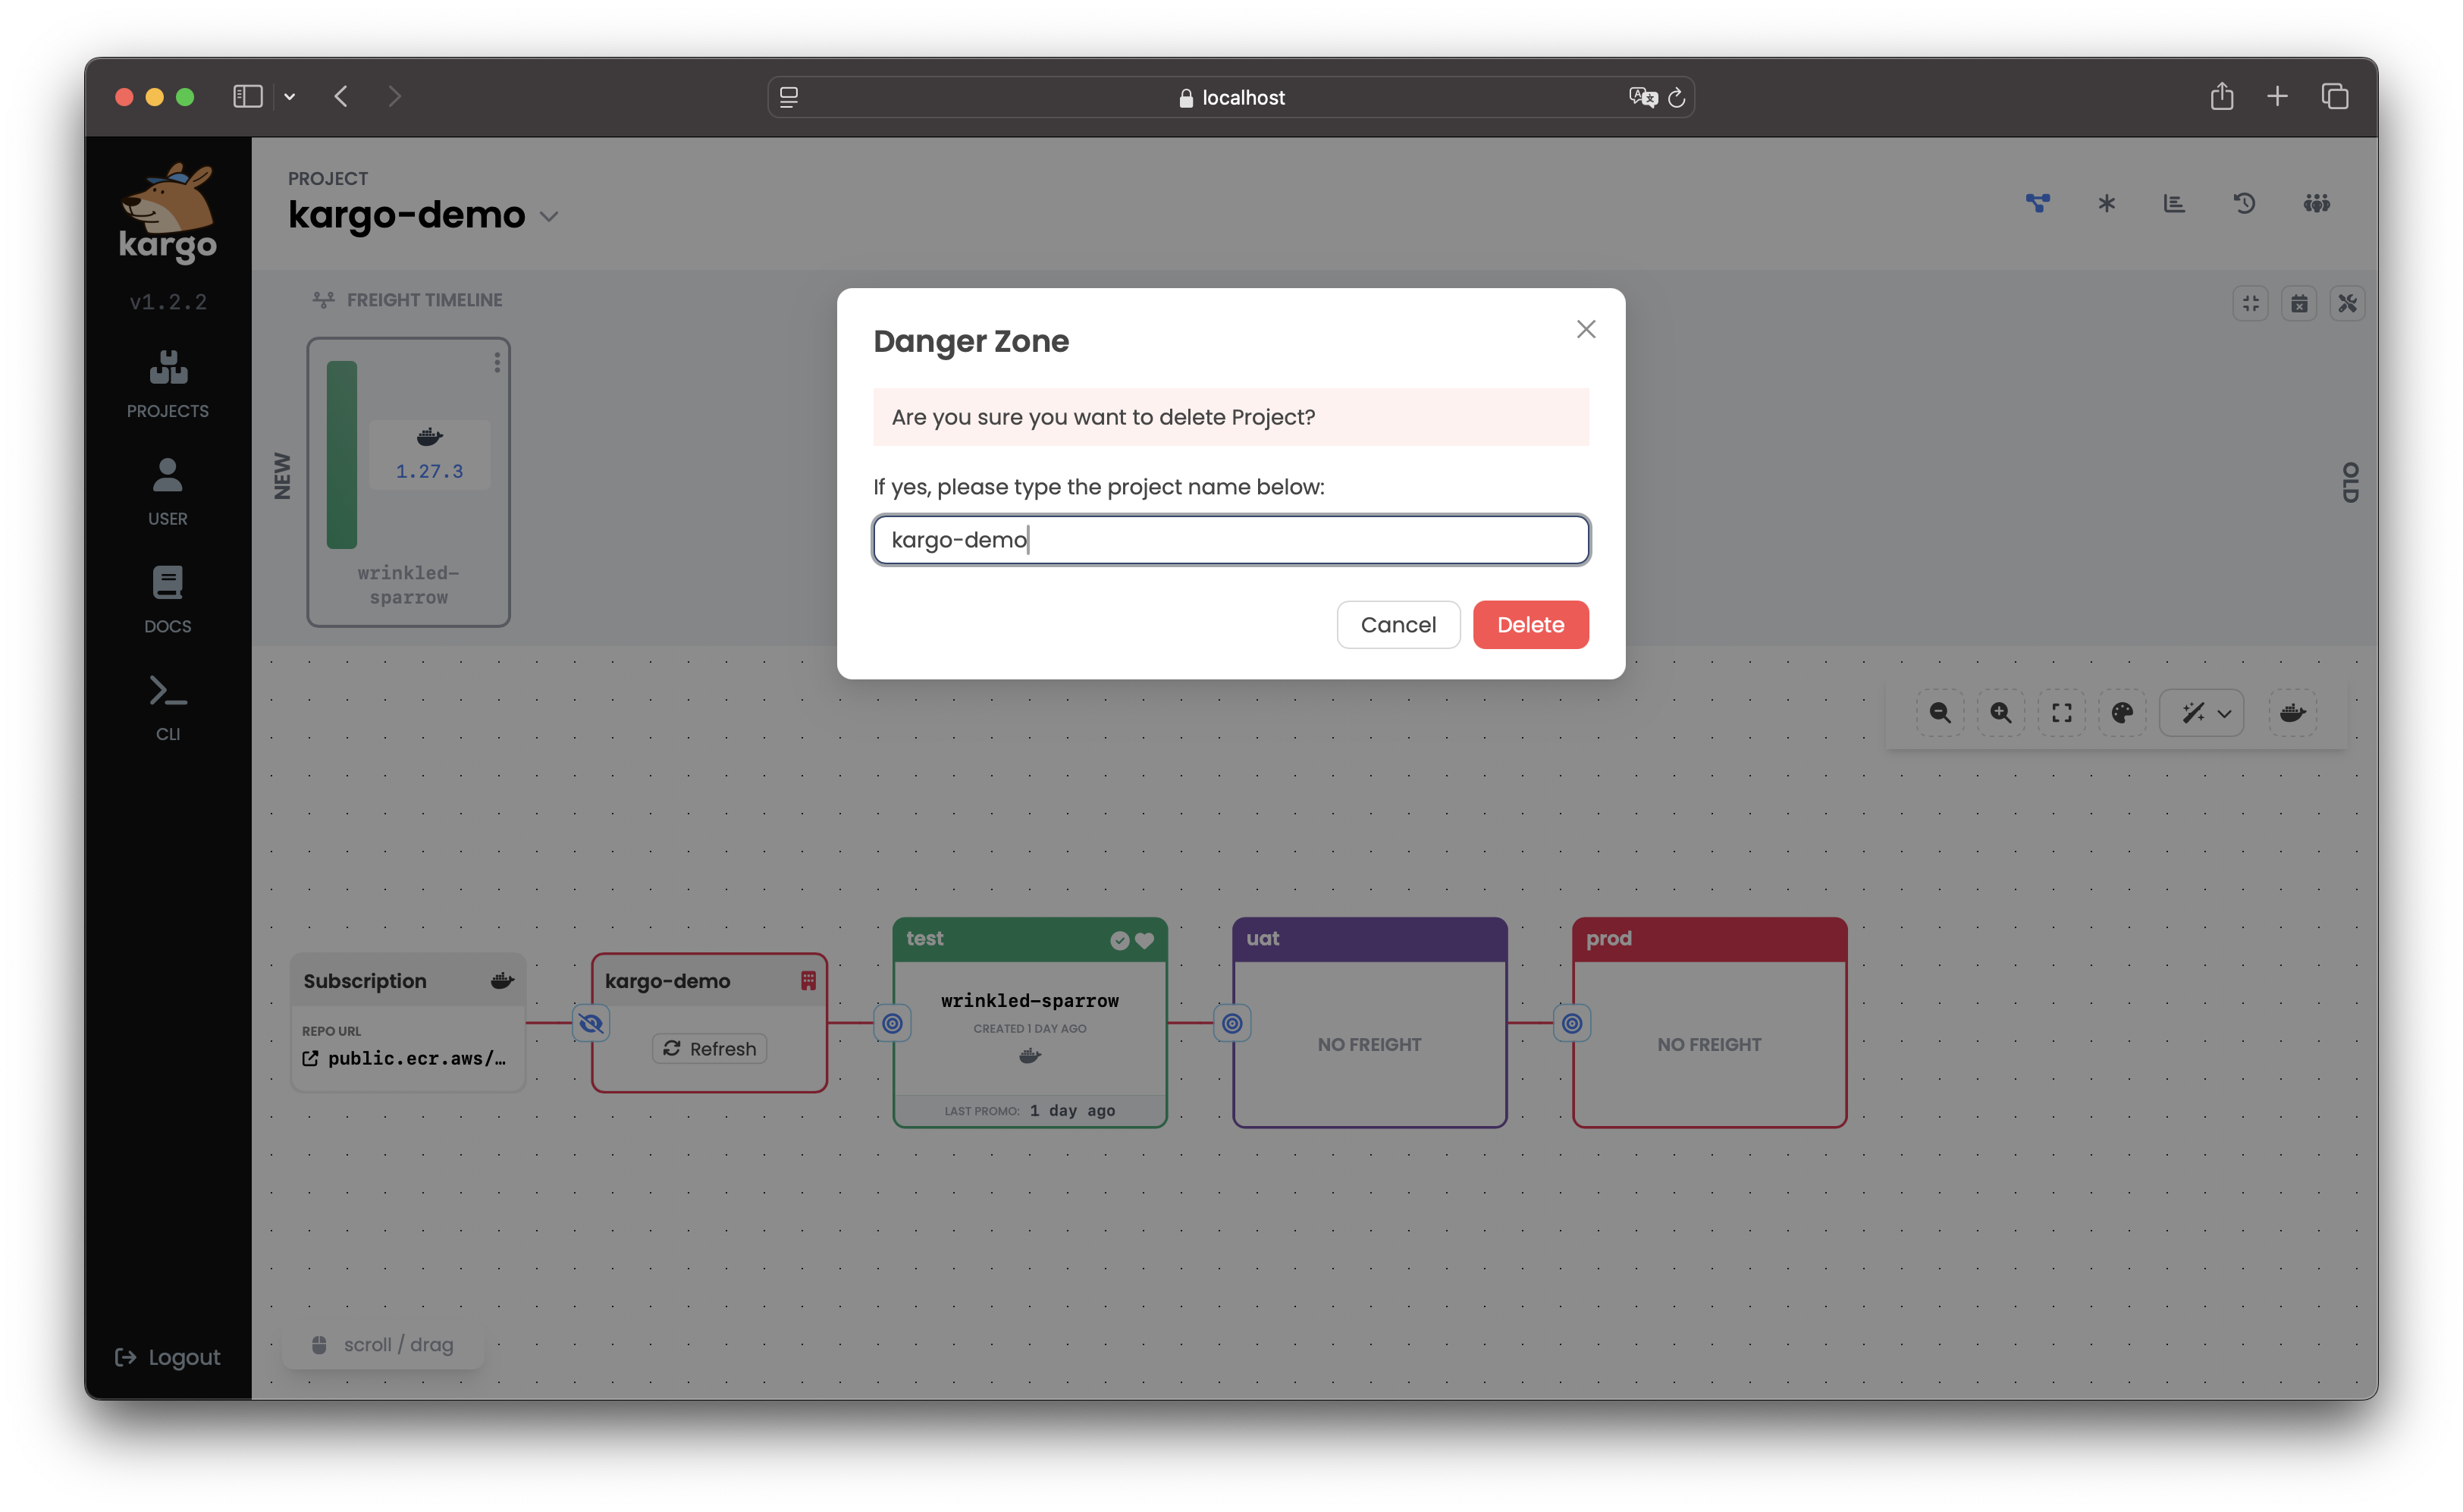
To delete a Project using the CLI, run:
kargo delete project <project>