AWS Cognito OIDC Configuration Guide
This guide explains how to configure AWS Cognito as an OIDC identity provider for Kargo.
The forms you will complete to enable Kargo to authenticate users against Cognito are different depending on whether you are:
-
Registering Kargo as a new application client for an existing user pool.
-
Creating a brand new user pool.
Be certain to follow the steps below that are appropriate to your scenario.
Using an Existing User Pool
-
Navigate to Cognito in your AWS dashboard.
The left sidebar may be collapsed by default. If it is, expand it by clicking the "hamburger" icon in the upper left corner of the page.

-
Select User pools.
-
Select the pool to which you would like to add Kargo as a client.
-
Select App clients from the left sidebar.
-
Click the Create app client button on the upper right of the page.
-
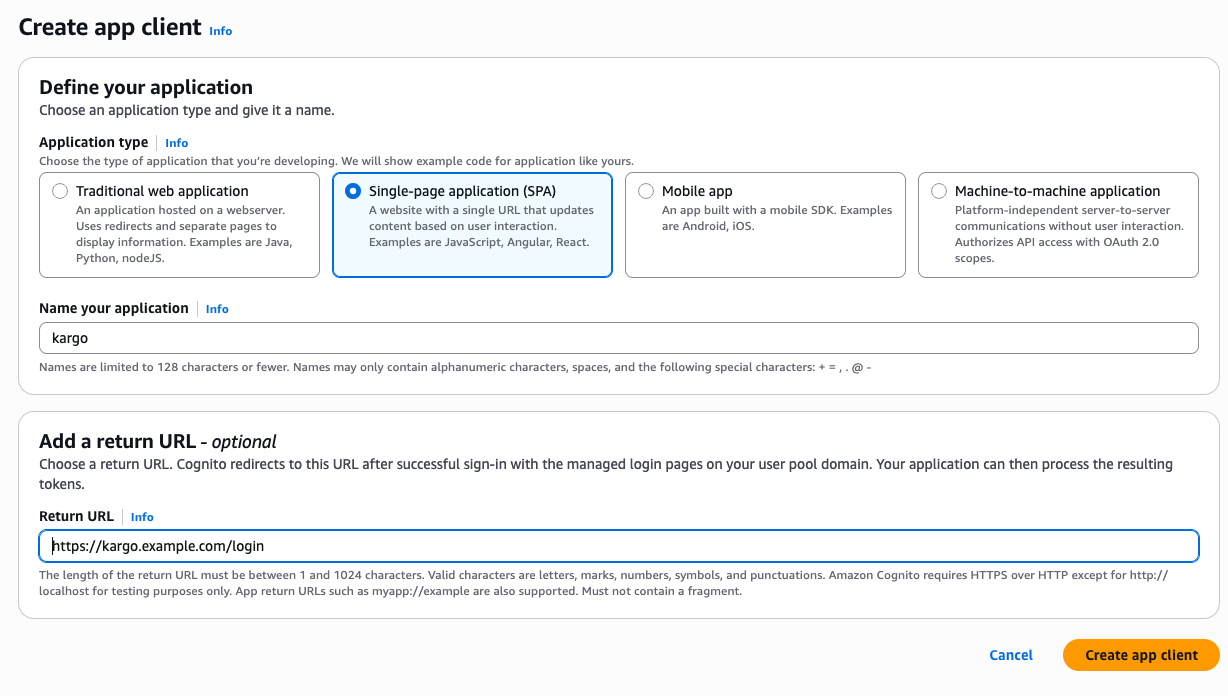
Complete the Create app client form:
-
Under Application type, select Single-page application (SPA).
-
Complete the Name your application field with a descriptive name, such as
kargo. -
Complete the Return URL field with a URL of the form
https://<kargo-hostname>/login. -
Click Create app client.
-
-
Skip ahead to the Configuring the App Client section of this page.
Creating a New User Pool
-
Navigate to Cognito in your AWS dashboard.
The left sidebar may be collapsed by default. If it is, expand it by clicking the "hamburger" icon in the upper left corner of the page.
-
Select User pools.
-
Click the Create user pool button in the upper right of the page.
-
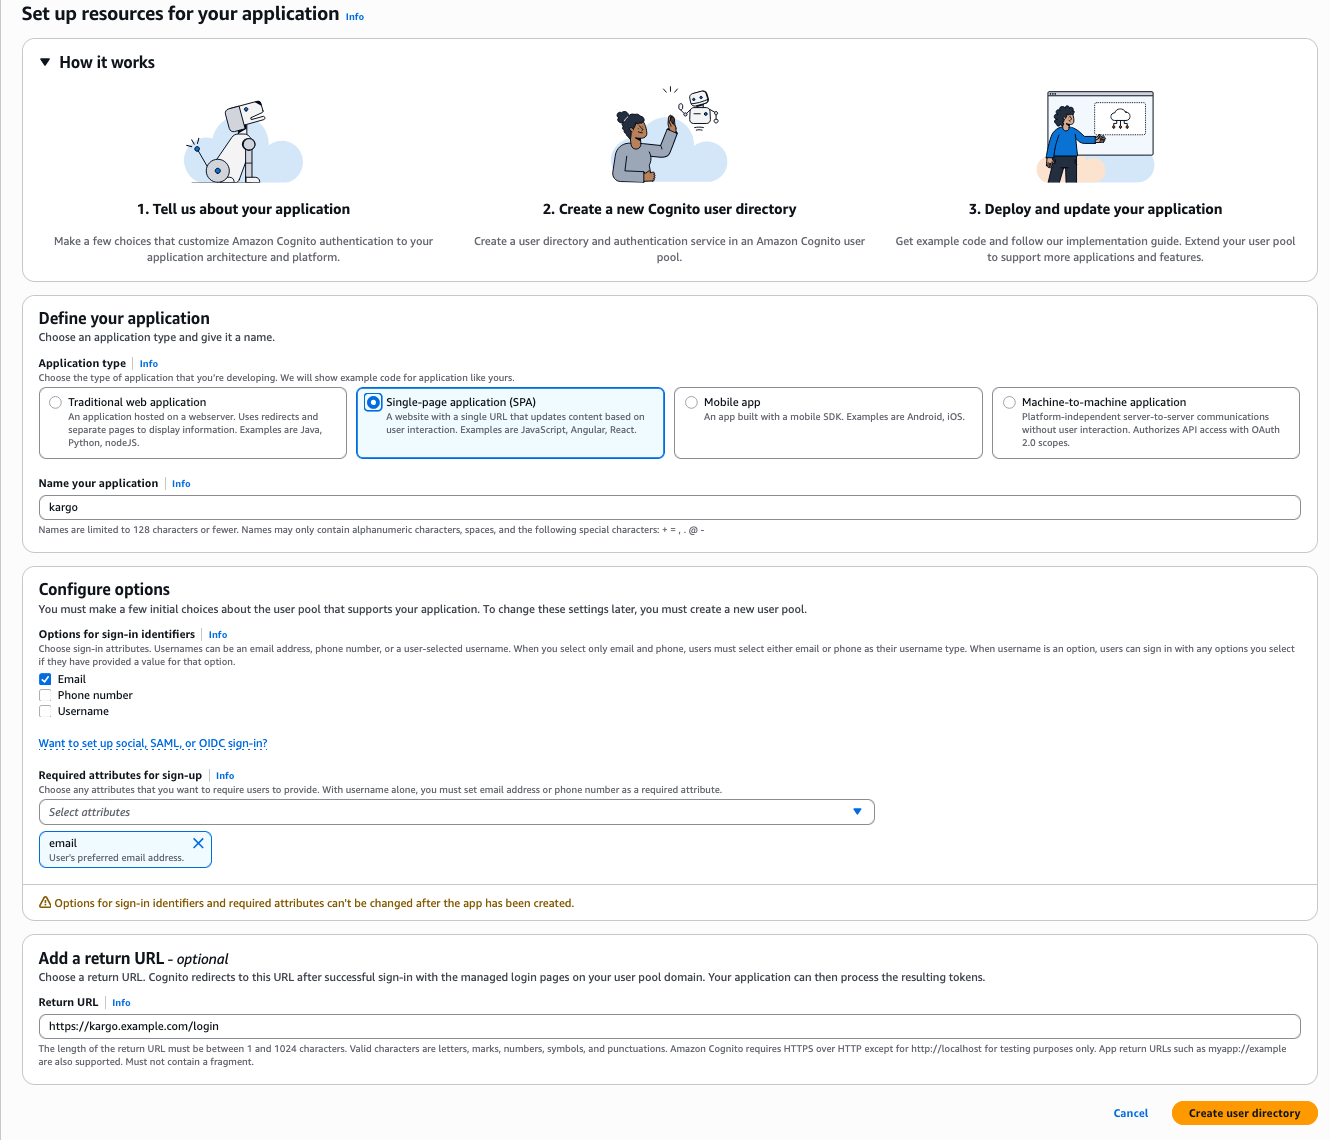
Complete the Set up resources for your application form:
 important
This single form asks you to both configure the user pool and register an app client.
Also note that you have no control over the name of the user pool. A unique name will be generated for you upon submission of this form.
-
Under Application type, select Single-page application (SPA).
-
Complete the Name your application field with a descriptive name, such as
kargo. -
Under Options for sign-in identifiers, select one or more identifiers for users to use when signing in.
noteThis is a feature of the user pool and not the client app.
-
Under Required attributes for sign-up, select all pieces of information you will require from users included in this user pool. At minimum, email must be selected.
infoKargo is unopinionated about how users actually authenticate to OIDC, identity providers (e.g. with username/email and password, social login, etc.) however, Kargo does depend on the user's email address being available in the standard claim
emailof the user's OIDC identity token. -
Complete the Return URL field with a URL of the form
https://<kargo-hostname>/login. -
Click Create user directory.
This creates the user pool and the app client.
-
-
Navigate to your newly created client app:
-
Select User pools from the left sidebar.
-
Select the user pool you just created.
-
Select App clients from the left sidebar.
-
Select the app client you just created.
-
-
Continue on to the Configuring the App Client section of this page.
Configuring the App Client
After completing the steps from either the Using an Existing User Pool or Creating a New User Pool section:
-
Select the Login pages tab.
-
In the Managed login pages configuration section, click Edit.
-
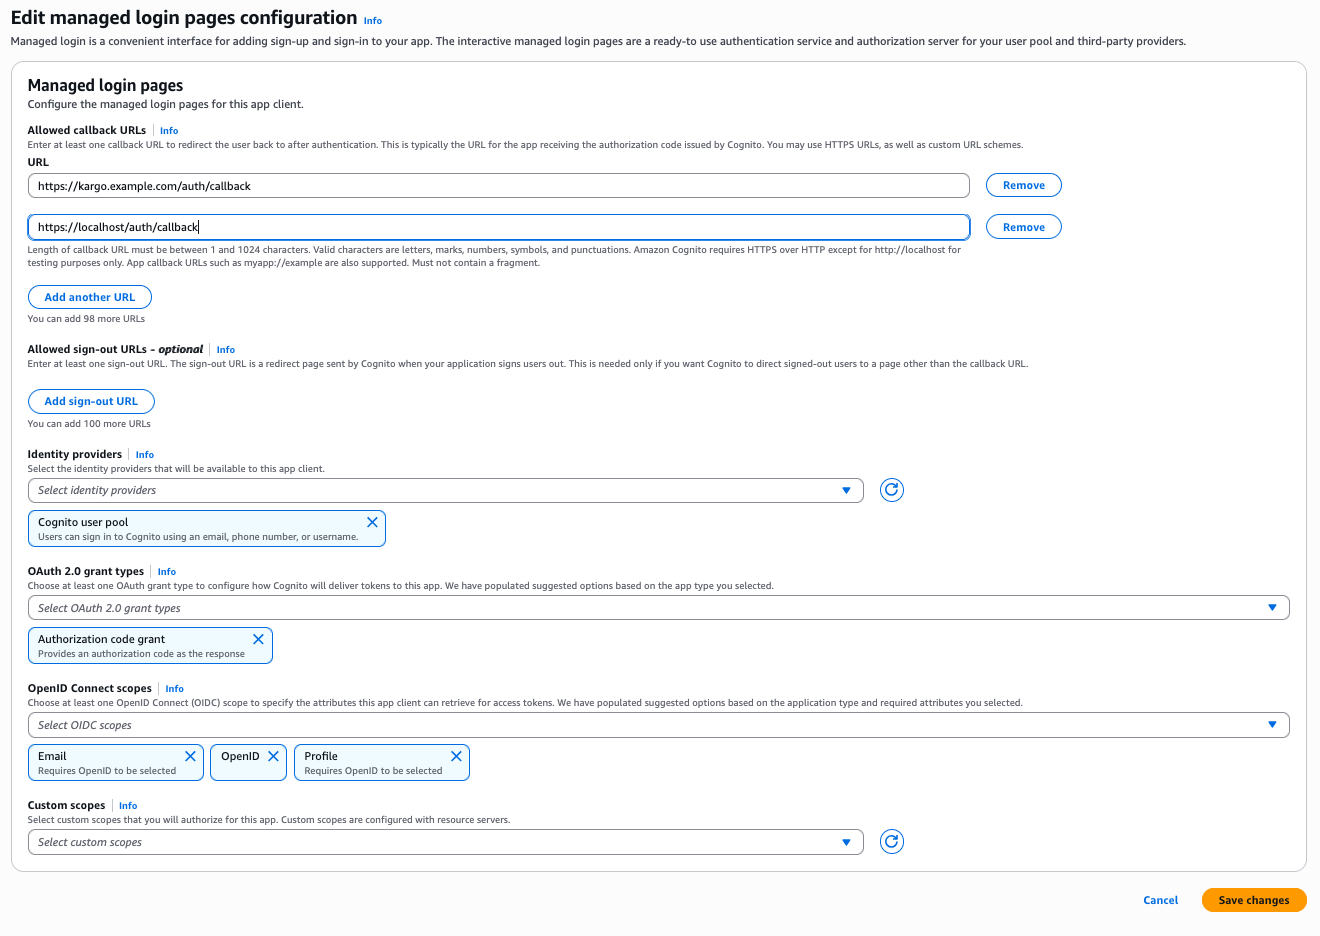
Complete the Edit managed login pages configuration form:
-
Under URL, include both of the following:
-
https://<kargo-hostname>/loginThis is where users of the Kargo UI will be redirected to after logging in.
-
http://localhost/auth/callbackThis is where users of the
kargoCLI will be redirected to redirected to after logging in. (The CLI launches a server to serve the request and complete the login process.)
-
-
Under OAuth 2.0 grant types, ensure Authorization code grant is selected.
-
Under OpenID Connect scopes, ensure that, at a minimum, Email, OpenID, and Profile are all selected.
You may additionally select any other scopes that permit access to other user information you'd like to make available to Kargo.
-
Click Save changes.
-
Configure Kargo
After Kargo has been registered as a client application for your Cognito user pool, all that remains is to retrieve relevant details and use them in installing or updating Kargo. The details you will require are:
-
The user pool's issuer URL
-
The client app's client ID
The unofficial, but most convenient way to locate both of these is in the React code sample in the Quick setup guide:
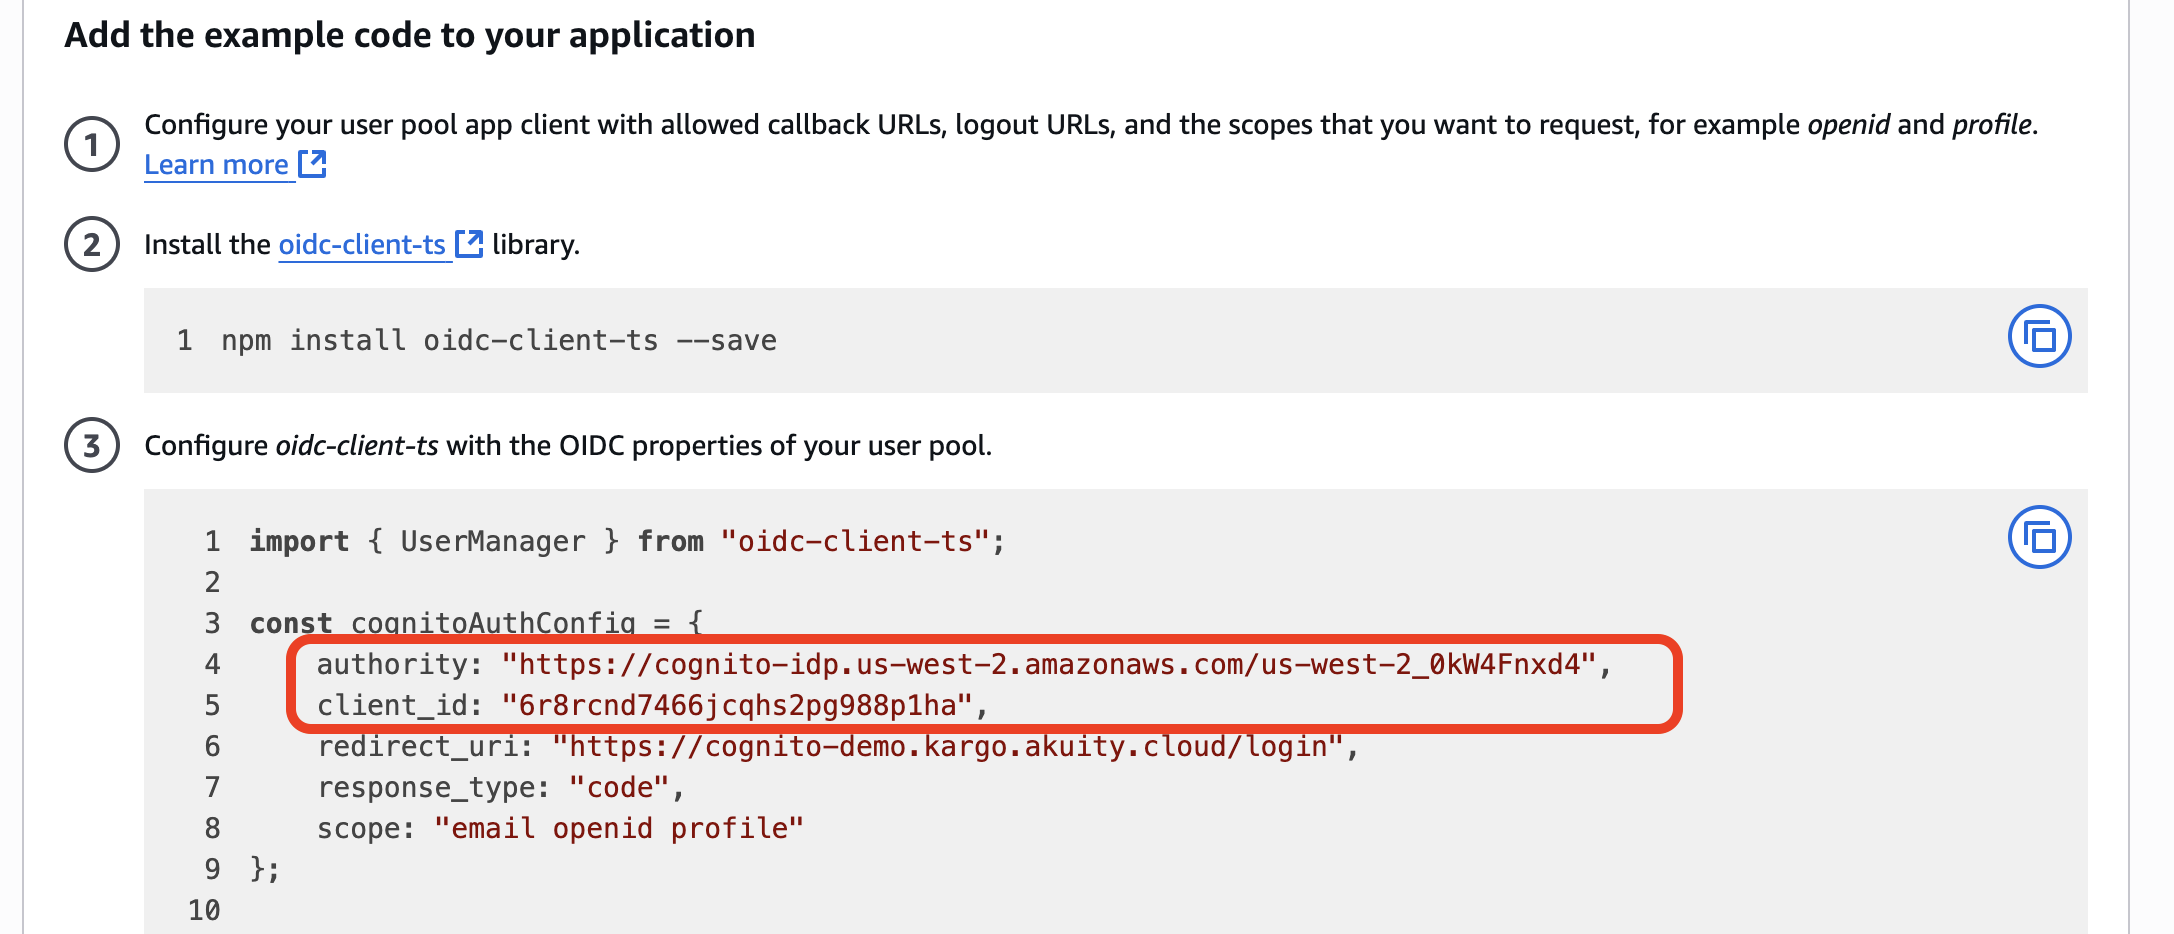
After making note of these values, use them as the values of the
api.oidc.issuerURL and api.oidc.clientID settings when installing or
updating Kargo using its Helm chart
as documented here.
Using Cognito as an identity provider, there is no need to create separate
client apps for the Kargo UI and the kargo CLI, and as such, the same client
ID should be used for both the api.oidc.clientID and api.oidc.cliClientID
settings.